Settings
Administration → Settings holds the configuration that applies to the whole organisation: the company's details, the rules for recording time and requesting absences, the preferred currencies and the default menu for each role. Only administrators see it.
The page has five tabs. Each tab has its own Save button and saves only what it shows, so a change on one tab never overwrites another.
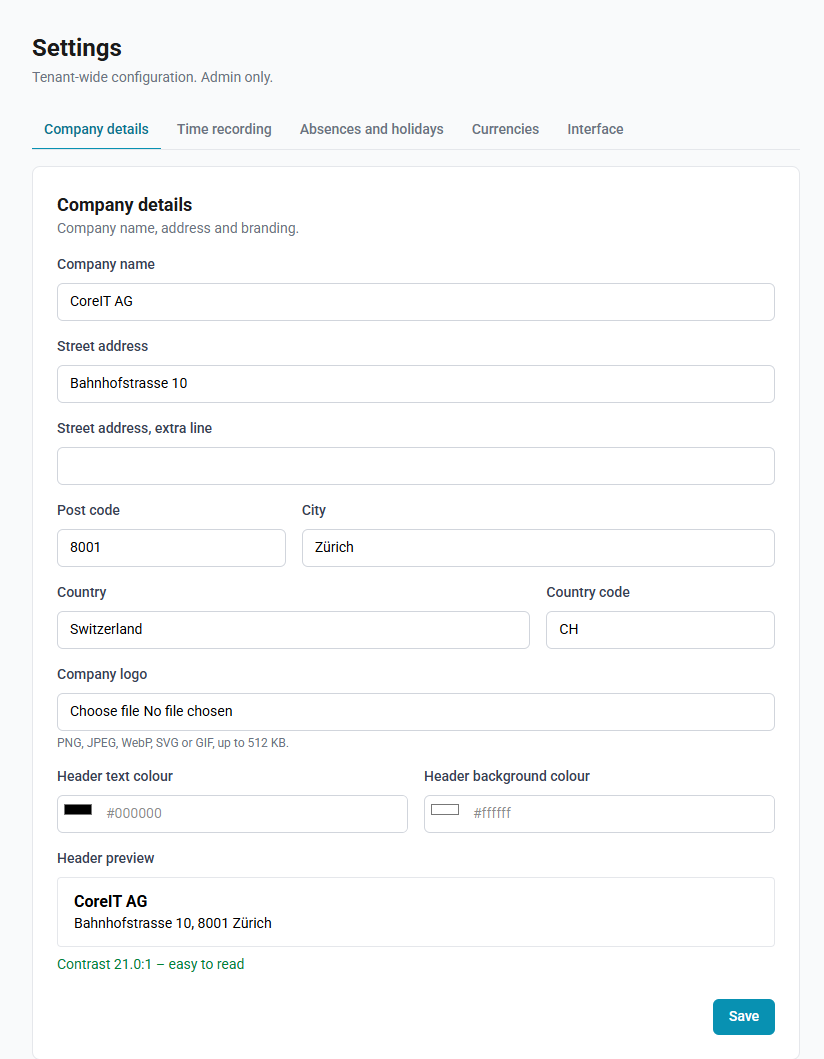
Company details
| Field | What to enter |
|---|---|
| Company name | The organisation's name |
| Street address, Street address, extra line | The postal address |
| Post code, City | |
| Country, Country code | Free text, as it should appear in the address. These fields do not affect public holidays; the country that does is on the Absences and holidays tab |
| Company logo | A PNG, JPEG, WebP, SVG or GIF file of up to 512 KB. A larger file is refused before it is sent |
| Header text colour, Header background colour | A colour chosen with the picker, or a value in the form #rrggbb |
These details are stored with your organisation's settings. No screen or document in ChronoHub displays them at present.
The Header preview shows the logo, the name and the address on the chosen colours. Beneath it, ChronoHub checks that the text is readable on the background: a contrast of at least 4.5:1 is reported as easy to read; anything lower is reported as hard to read, with a Fix text colour button. The fix changes only the text colour, to the nearest readable one, and leaves the background as chosen.
How to add or replace the logo
- Open the Company details tab.
- Under Company logo, choose the file. A preview appears beside the field.
- Select Save.
To take the logo away, select Remove under the preview, then Save.
Time recording
| Setting | What it does |
|---|---|
| Maximum batch size (days) | The longest period, in calendar days, for which timecards can be created in one go. A longer period is refused. Between 1 and 366 |
| Confirmation threshold (days) | When someone creates timecards for more days than this in one go, ChronoHub asks them to confirm first. Between 1 and 366 |
| Full-time weekly hours | The hours a week that a 100% contract stands for. An employee's contract shows the weekly hours its percentage corresponds to on this basis. Up to 80 |
| Block overdrawn timecards | When ticked, a timecard in a category that draws on a yearly allowance is refused if it would exceed what remains of that allowance |
An employee's own record can override Block overdrawn timecards for that person, in either direction. See Employees.
Absences and holidays
| Setting | What it does |
|---|---|
| Block overdrawn absence requests | When ticked, a request that would exceed the employee's yearly allowance is refused. An employee's own record can override this for that person |
| Default country | The country new employees are created with. Employees who already exist keep their own country. See Country on an employee |
| Flex balance at year end | What happens to a positive flex balance on 31 December: Carry over in full, Lapse, or Carry over up to a limit, with the limit in hours. A negative balance always carries over |
| Take off hours short of the schedule | When ticked, flex counts both ways: on a day with work recorded by hand, hours short of the schedule are taken off, and the balance may go below zero. A day with nothing recorded by hand still counts as worked as scheduled. Off by default. See How time is counted |
A change to Flex balance at year end applies from the coming 31 December; the tab says so before you save. Earlier year ends keep the rule that applied to them. See Flex and opening balances.
Take off hours short of the schedule applies to each flex period the next time a timecard in it is saved. Clearing it again removes the hours taken off straight away.
Currencies
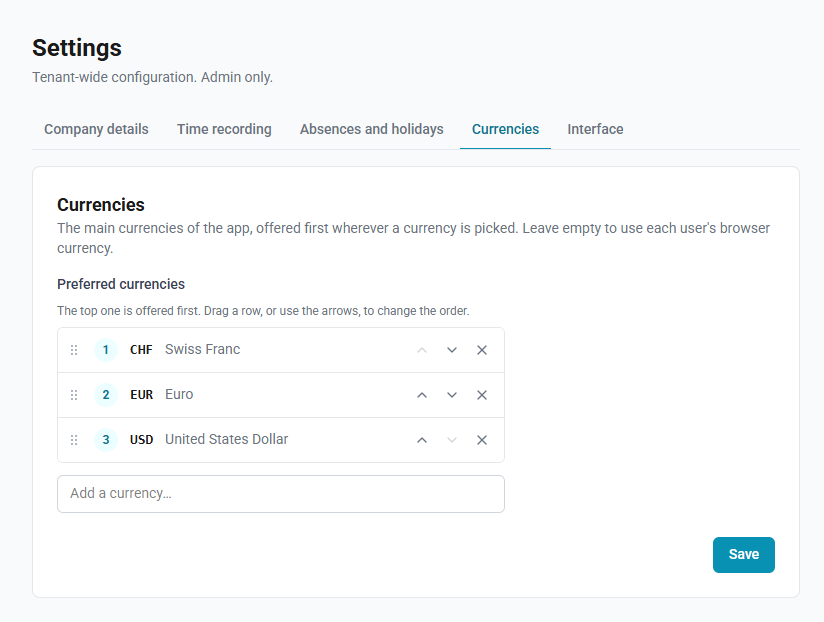
The Preferred currencies are the currencies your organisation mainly uses. Wherever a currency is chosen for an expense, an empty field opens on this list, in this order, and a search lists matching preferred currencies first. Up to 10 can be chosen.
With no preferred currencies, a new expense starts on the currency of the user's browser language. With a list set, the currency of a new expense starts empty and is chosen from the list.
How to set the preferred currencies
- Open the Currencies tab.
- Choose a currency in Add a currency…. Repeat for each one.
- To change the order, drag a row, or use its arrows. The top row is offered first.
- To remove a currency, select the × on its row.
- Select Save.
Interface
The Interface tab sets, for each role, which menu entries are shown by default and which the users of that role may not change. It is described in Choosing what appears in the menu.